
close
Choose Your Site
Global
Social Media


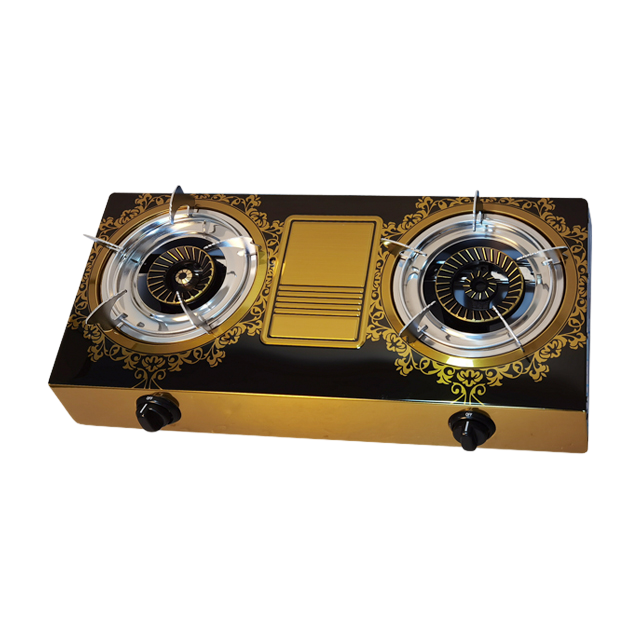
Removing a gas-powered appliance is not your average weekend project. It carries immediate life-safety risks, such as combustible gas leaks, and long-term liabilities, including code violations or voided insurance policies. A single mistake can easily endanger your home and family. Therefore, understanding the mechanics of your kitchen's infrastructure is crucial before you touch a single valve.
Many homeowners eventually face this specific challenge. You might be upgrading to a modern induction cooktop to improve indoor air quality. Or perhaps you just need to replace an aging unit. Either way, executing this removal correctly is non-negotiable. You cannot cut corners when dealing with highly pressurized, flammable substances.
We will explore how to handle this safely. You will learn a rigid, code-aware framework to evaluate whether to DIY or hire a professional. We will also provide the exact technical steps required for a safe, secure disconnection.
Scope of Work: Disconnecting a single appliance is fundamentally different from abolishing a property's gas line.
Safety First: Locating shutoff valves and performing a 1:2 ratio soap-water leak test are mandatory steps, not optional precautions.
Compliance & Insurance: Improper DIY removal can lead to denied home insurance claims and code violations.
Material Constraints: Never reuse old flexible gas connectors, and strictly adhere to thread-sealing protocols (e.g., yellow Teflon tape on pipe threads only, never on connector nuts).
You must define the distinct levels of gas removal before starting any physical work. This helps homeowners assess their actual needs and legal boundaries. Many people confuse swapping an appliance with tearing out the underlying infrastructure. These are completely different projects. They require different budgets, different skills, and different permits.
Node 1: Simple Disconnection (The "Cap and Leave" Approach)
Most kitchen renovations only require a simple disconnection. You detach the appliance from the outlet valve and cap the pipe. This approach is usually sufficient for replacing a unit or switching to electric cooking. You leave the structural piping intact behind the wall.
This path carries a low cost. You mostly pay for a few basic plumbing parts. If you hire a professional, you face a minimal service fee. It typically hovers around $150.
Node 2: Complete Line Removal (Meter Abolishment)
Complete line removal represents a massive structural change. This means physically stripping the gas infrastructure from the street to your property. You remove the meter, the exterior pipes, and the interior supply lines.
This level of work mandates a licensed Gas Fitter. You cannot do this yourself under any circumstances. Local utility companies must be involved. The cost implication can escalate rapidly into the thousands of dollars, usually landing between $1,000 and $2,000.
Scope Level | Definition | Required Expertise | Estimated Cost |
|---|---|---|---|
Simple Disconnection | Detaching and capping the terminal wall valve. | Experienced DIYer or Plumber | $20 - $150 |
Complete Removal | Stripping infrastructure from street to house. | Licensed Gas Fitter & Utility Co. | $1,000 - $2,000 |
You must address the regulatory and safety prerequisites before touching any valves. Preparation separates a successful project from a catastrophic failure. Do not skip these steps.
Many municipalities require a permit to legally cap a gas line. They also demand a post-work inspection by a local building official. You must check your local codes. Building inspectors want to ensure the cap is leak-free and structurally sound. Skipping the permit process can delay future home sales.
Insurance ramifications present another massive risk. A botched DIY job resulting in a leak can void homeowner policies. Insurance adjusters actively look for unpermitted or amateur plumbing work after fire or explosion incidents. If they trace the damage back to your DIY capping job, they will deny the claim. You bear the entire financial burden.
Always consult your specific gas stove manufacturer documentation. Brands often use proprietary shutoff mechanisms. They may also enforce strict warranty conditions. Reading the manual prevents you from damaging internal regulators during removal.
Finally, establish a safe environmental setup. Emphasize critical safety prep before pulling out your wrenches.
Open multiple windows to cross-ventilate the kitchen.
Turn on exhaust fans to move air outside.
Extinguish all open flames in the vicinity, including candles or nearby pilot lights.
Keep a fire extinguisher within arm's reach.
You need a linear, fail-safe Standard Operating Procedure (SOP). Follow these steps exactly in the listed order. Gather two adjustable wrenches, specialized thread sealant, and a spray bottle before you begin.
You must isolate the fuel supply. If your kitchen utilizes a dual-valve system, you have a main line valve and a terminal appliance valve. Always close the main line first. This provides a secondary layer of protection.
Valve identification varies by appliance type. You need to know where to look:
Freestanding Stoves: Usually located directly behind the unit. You can often access it by removing the bottom broiler drawer.
Cooktops: Typically mounted inside the base cabinet directly underneath the counter.
Wall Ovens: Often found in an adjacent cabinet or a lower fixed cabinet space.
Once located, execute the shutoff action. Turn the valve handle a quarter-turn (90 degrees). The handle should sit perfectly perpendicular to the gas pipe. If it is parallel, the fuel is still flowing. Never force a stuck valve. If it resists moderate pressure, call a professional plumber immediately.
You must safely unthread the flexible connector from the wall valve. Do not try to unthread it from the appliance side first. Always start at the wall to secure the supply source.
Use two wrenches for this task. Place one wrench on the valve body to hold it steady. Place the second wrench on the flare nut of the flexible hose. Turn the nut counter-clockwise. Holding the valve steady is crucial. It prevents you from accidentally torquing or snapping the hard pipe inside the wall.
You cannot leave an open valve exposed. You must cap it. Specify the required hardware before going to the store. You need a properly sized threaded iron or brass cap. Black iron is the industry standard for residential supply lines.
You must follow a crucial sealing rule. Mandate the use of yellow Teflon tape. This specific tape is rated exclusively for natural gas and propane. It is thicker and denser than white plumbing tape. Wrap the tape clockwise around the external pipe threads. Three firm wraps are usually sufficient.
Avoid a dangerous common mistake. Explicitly warn against applying tape to the flare nut threads of a connector. Flare fittings rely on metal-to-metal contact to create a seal. Adding tape to a flare thread guarantees a broken seal and a subsequent leak.
You must verify your work. Outline the industry-standard verification method. Create a testing solution in a spray bottle. Mix a 1:2 ratio of liquid dish soap to water. Shake it gently.
Turn the valve slightly back on to pressurize the capped segment. Spray the soap solution generously onto the newly capped pipe joint. Watch the area closely for five minutes.
Interpret the results carefully. If the solution sits flat, your seal is tight. If bubbling occurs, you have a dangerous micro-leak. Bubbles indicate escaping pressure. You must immediately turn the valve off, remove the cap, clean the threads, apply fresh tape, and try again. If it leaks a second time, call a professional.
Homeowners often struggle to choose between doing it themselves and hiring help. You need a pragmatic decision framework based on your actual technical competency. Be honest about your skills.
The DIY Route
This path is best reserved for highly experienced homeowners. It only applies in jurisdictions where DIY gas work is legally permissible. Many places outlaw it entirely. You must understand the false economy of saving a few dollars. Saving $125 is never worth risking a major hazard. If you feel nervous holding a wrench, put it down.
The Professional Route
We strongly recommend hiring a licensed plumber or HVAC technician. They possess the training, the tools, and the liability coverage.
Detail expected costs to budget accordingly. Standard disconnection and capping typically cost between $125 and $400. The price fluctuates based on regional labor rates and pipe accessibility.
Highlight the value of liability transfer. A professional's work is insured. Their work is automatically code-compliant. If a leak occurs later, their insurance policy covers the damages. You buy peace of mind alongside physical labor.
Factor | DIY Route | Professional Route |
|---|---|---|
Cost | $20 - $50 (Parts only) | $125 - $400 (Labor + Parts) |
Liability | Homeowner assumes all risk. | Contractor's insurance covers issues. |
Code Compliance | Often fails inspection if unpermitted. | Guaranteed to meet local codes. |
You need to connect the removal process to your broader kitchen upgrade goals. Disconnecting the appliance is only the first phase. The empty space demands a plan.
Replacing with a New Gas Unit
If you are installing a new gas stove, you must obey the golden rule of plumbing. Never reuse old flexible connectors. The metal ridges in flexible hoses suffer micro-fractures during removal. Rebending them creates invisible leaks. Always buy a brand-new stainless steel connector.
Transitioning to Induction or Electric
Many homeowners choose to leave fossil fuels behind entirely. Transitioning to electric cooking requires significant infrastructure shifts. Note the primary infrastructure requirement. Upgrading usually requires an electrician. They must pull a new 240-volt dedicated circuit to the kitchen. Standard 120-volt outlets cannot power a full-sized electric range.
Mention the associated lifestyle shifts. You must ensure your current cookware is magnetic. Aluminum or pure copper pots will not work on induction surfaces. However, you will enjoy vastly improved indoor air quality. Eliminating combustible fuels means eliminating toxic nitrogen dioxide and carbon monoxide emissions inside your home. It creates a healthier breathing environment for your family.
Knowing how to remove a cooking appliance provides valuable insight into your home's infrastructure. However, the physical execution carries zero margin for error. A tiny mistake can lead to catastrophic property damage or severe injury.
We recommend a cautious approach. Make sure to buy the correct sealing tape. Always test your connections using the soap-water method. If you hit resistance, stop immediately.
Prioritize code compliance and professional assessment over marginal cost savings. Paying a licensed plumber ensures your home remains safe, insured, and legally compliant. Protect your investment and your family by making smart, deliberate choices.
A: No. Building codes and safety standards strictly dictate buying a new connector. Reusing old hoses leads to micro-fractures in the corrugated metal. This dramatically increases the risk of hidden leaks. Always purchase a new line.
A: It typically costs between $150 and $400. The exact price depends on your local labor rates, the complexity of your piping, and whether the technician needs to crawl into tight spaces to access the main valve.
A: It depends heavily on local municipal codes. Many cities require a permit and a subsequent inspection. Building officials want to ensure the cap is entirely leak-free and uses the correct thread sealant.
A: Do not use excessive force. Yanking on the unit could torque the main supply line inside the wall. Consult a professional. Alternatively, apply targeted penetrating oils, but keep them far away from any open fuel sources.
A: Yes. Provided it was capped correctly using proper thread sealant, and successfully passed a leak test, it is safe. This allows other appliances in your home, like furnaces or water heaters, to operate safely.

